Incorrectly configured Google Workspace MX records can stop emails from reaching Gmail inboxes, leading to delivery failures and lost communication.
Setting up Google Workspace MX records is crucial for proper email routing.
These records ensure that your emails are directed to Google’s servers, allowing reliable email delivery to your Gmail inbox.
In this guide, we’ll walk you through six simple steps for a seamless Google Workspace MX records setup, ensuring smooth email delivery and boosting your workflow efficiency.
TL;DR – How to Set Up MX Records in Google Workspace
- MX records are essential for routing emails correctly to your domain’s mail server.
- Without them, emails will bounce and never reach your inbox.
- For Google Workspace, setting MX records ensures messages go directly to Gmail’s servers for reliable delivery.
- Correct setup reduces bounce rates, prevents delivery errors, and strengthens email security.
- Configuration involves removing old MX records, adding Google’s records, and verifying them in the Admin Console.
- Propagation can take up to 72 hours, so testing after setup is important.
- Zapmail automates the setup of MX, SPF, DKIM, and DMARC records, helping teams configure their Google & Microsoft domains & mailboxes faster
Why Does MX Records Matter?
MX records are vital because they tell the internet where to send emails for your domain. Without them, your emails won’t reach your inbox.
For Google Workspace, correctly set MX records ensure emails are routed to Google’s servers, ensuring reliable delivery to your Gmail inbox.
MX records also play a key role in email security and deliverability.
When configured correctly, they help prevent bounced emails, reduce the risk of messages being marked as spam, and ensure smooth communication with clients and partners.
It is the backbone of a dependable email system.
Simply put, MX records are essential for smooth, uninterrupted email communication, keeping your business connected and your workflow intact.
Step 1: Log in to Your Domain Registrar
To begin setting up MX records for Google Workspace, you’ll need to log in to your domain registrar account. This is the platform where you purchase and manage your domain, such as GoDaddy, Namecheap, or Cloudflare.

Once logged in, find the DNS settings or DNS management section of your account.
This is where you can update and manage your domain’s DNS records, including the MX records that direct email traffic to Google Workspace.
Step 2: Open DNS Settings
Next, navigate to your domain’s DNS management section. This may be called “DNS Records,” “Domain Management,” or “Name Server Management,” depending on your registrar.
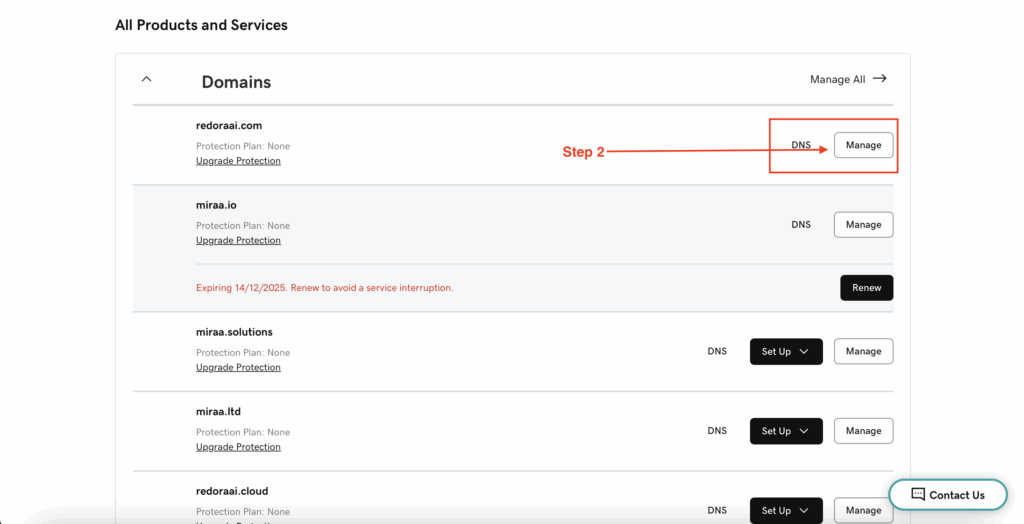
In this section, you’ll be able to manage your domain’s DNS records, where you’ll add the necessary MX records for Google Workspace.
Step 3: Remove Old MX Records
Delete any existing MX records in your DNS settings to prevent conflicts with Google Workspace.
Be careful not to remove other DNS records, such as A or CNAME records, as they are essential for your website and other services to function correctly.
Removing old MX records ensures that email traffic is routed only through Google’s servers, which helps avoid delivery errors, bounced emails, or missed messages. This step is crucial for a smooth and reliable Google Workspace email setup.
Step 4: Add Google’s MX Record
Now it’s time to add Google Workspace’s MX record to your domain.
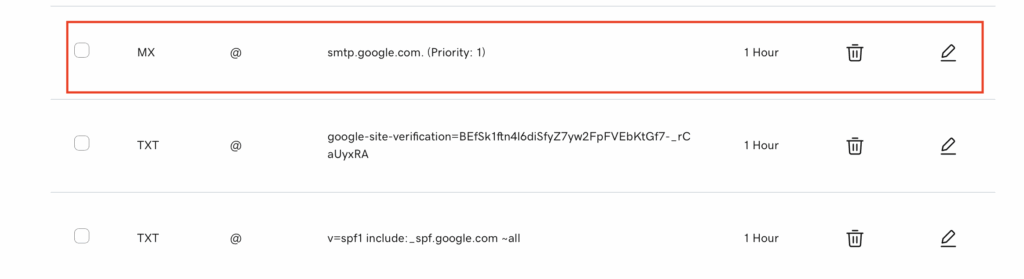
Create a new MX record using the following values:
- Type: MX
- Host: @ (or leave blank, depending on your registrar)
- TTL: Default or 1 hour
- Priority: 1
- Value/Destination: smtp.google.com (some registrars may require smtp.google.com. with a dot at the end)
This record directs your domain’s email to Google’s servers, ensuring that all incoming messages are delivered to your Gmail inbox.
Step 5: Activate Gmail in Admin Console
After setting up your MX records, you need to activate Gmail for your domain.
- Log in to the Google Admin console using an administrator account.
- Navigate to Domains → Manage Domains → Activate Gmail.
- Follow the on-screen instructions to complete the activation process.
This step ensures that Gmail is linked to your domain and ready to send and receive emails through Google Workspace.
Also Read: How to Improve Email Deliverability: Expert Tips
Step 6: Verify and Wait for Propagation
Once you’ve added the MX records and activated Gmail, it’s time to verify your setup.
- Use Google’s inboxes setup tool, like Admin Toolbox Dig or an MX lookup to confirm that your MX records are correct.
- Keep in mind that DNS changes can take 24–72 hours to propagate across the internet.
- After propagation, test sending and receiving emails to ensure everything is working properly.
This final step ensures your Google Workspace email is fully operational and ready for daily use.
Common MX Record Errors and How to Solve Them
- Domain not verified: Make sure you’ve completed domain ownership verification in Google Workspace.
- Incorrect entries: Double-check your MX record values, priorities, and formatting to ensure they match Google’s requirements.
- Propagation delays: DNS changes can take up to 72 hours to fully propagate, so give it time before troubleshooting further.
- Diagnostic tools: Use Google’s Admin Toolbox Dig to confirm that your MX records are correct.
- Registrar help: If issues persist, contact your domain registrar’s support team for assistance in reviewing your DNS settings.
For additional guidance and troubleshooting, check out Google Workspace Support.
Set up MX Records, SPF, DKIM, and DMARC in minutes using Zapmail
Set the foundation first (must-haves)
- MX records: Route incoming mail to the right inbox.
- SPF: Lists the servers allowed to send mail for your domain.
- DKIM: Cryptographic signature that proves the email wasn’t altered.
- DMARC: Policy that blocks spoofing/phishing and tells receivers how to handle failed checks.
Why this matters (especially for cold email)
- Better sender reputation → fewer spam placements.
- Fewer authentication errors → higher open and reply rates.
- Clear DMARC policy → protects your domain and trust.
Infrastructure tips for deliverability
- Use US/EU-hosted Google Workspace or Microsoft 365 mailboxes for stable IPs and higher trust.
- Keep sending volumes gradual; warm up new mailboxes before scaling.
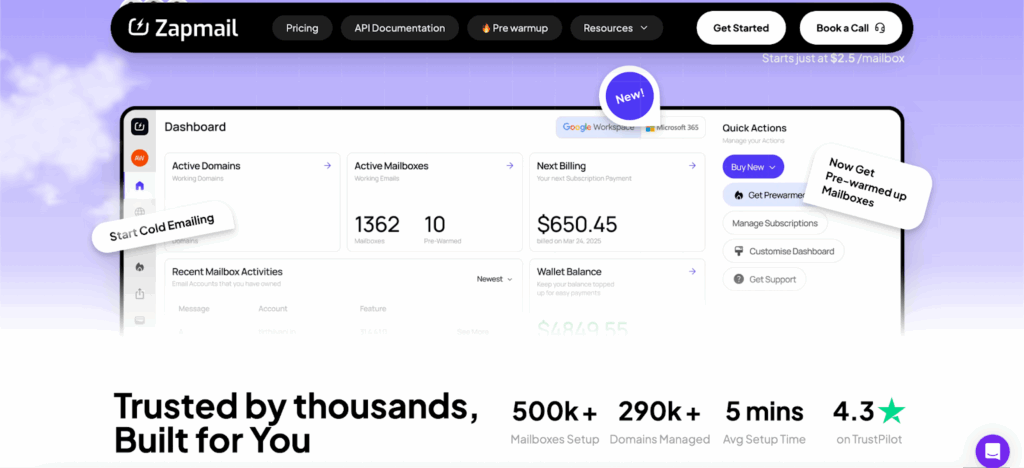
Once the foundation is set, Zapmail can streamline your workflow.
- Triage & tagging: Auto-label prospect replies (e.g., “Interested,” “Not Now”).
- Follow-ups: Send polite auto-replies or reminders based on keywords or timing.
- Work creation: Turn emails into tasks or calendar events (e.g., book demos, set callbacks).
- CRM sync: Log emails/contacts to HubSpot/Salesforce automatically.
- Ops logging: Push inquiries to Google Sheets for tracking and QA.
- Routing: Auto-forward VIP/client emails to the right teammate.
With strong email authentication and Zapmail’s automation, you save time, reduce manual work, and ensure your cold emails actually reach their targets.
Example workflows
- New reply with “interested” → create a Calendar event + task in Asana, update deal stage in CRM.
- Support email received → tag + forward to the success channel, add a row to Google Sheets.
- No reply after 3 days → trigger a personalized follow-up from the same thread.
Conclusion
Setting up MX records correctly is essential for ensuring smooth and reliable email operations in Google Workspace.
Proper configuration directs your domain’s email to Google’s servers, preventing delivery issues and keeping your communication seamless.
Once your MX records are in place, tools like Zapmail can further enhance your email experience by automating tasks, organizing workflows, and integrating Gmail with other apps to boost productivity.
With MX records properly configured and automation tools like Zapmail in place, your Google Workspace email system will be efficient, reliable, and ready to support your business needs.
Get started with Zapmail to get unbeatable deliverability with US-hosted Google & Microsoft mailboxes.
FAQ
1. What is an MX Record?
An MX (Mail Exchange) record directs email sent to your domain to the correct mail servers.
2. Why delete old MX records before setting up Google Workspace?
Old MX records can cause conflicts and delivery issues. Removing them ensures emails go only through Google’s servers.
3. How to get a DKIM record from Google Workspace?
In the Admin console, go to Apps → Google Workspace → Gmail → Authenticate Email to generate a DKIM record for your domain.
4. How to set up DNS in Google Workspace?
Access your domain’s DNS settings, remove old MX records, add Google Workspace MX records, and verify in the Admin console.
5. How long does it take for MX records to propagate?
DNS changes can take 24–72 hours to fully propagate.
6. Can I keep using my old email system?
Once MX records point to Google, emails go to Gmail. Continuing with the old system requires special forwarding or hybrid setups.
7. Where to find MX records in Google Workspace?
Check the Admin console under Setup → Domains → Set up Google MX records or visit Google Workspace support.